Installation
This guide provides detailed instructions for installing Kedify in your Kubernetes cluster.
First, create a cluster connection in the Kedify Service Dashboard, then install the Kedify Agent in the Kubernetes cluster. For a GitOps-friendly installation, refer to the Fleet Installation or Helm Installation guides.
Prerequisites
- A running Kubernetes cluster (a local cluster or cloud-based EKS, GKS, etc)
- The
kubectlcommand line utility installed and accessible - Created account and signed up in the Kedify Service
Connect New Cluster
To connect a new cluster, follow these steps:
-
Create a New Cluster Connection:
- Either from the Overview section:
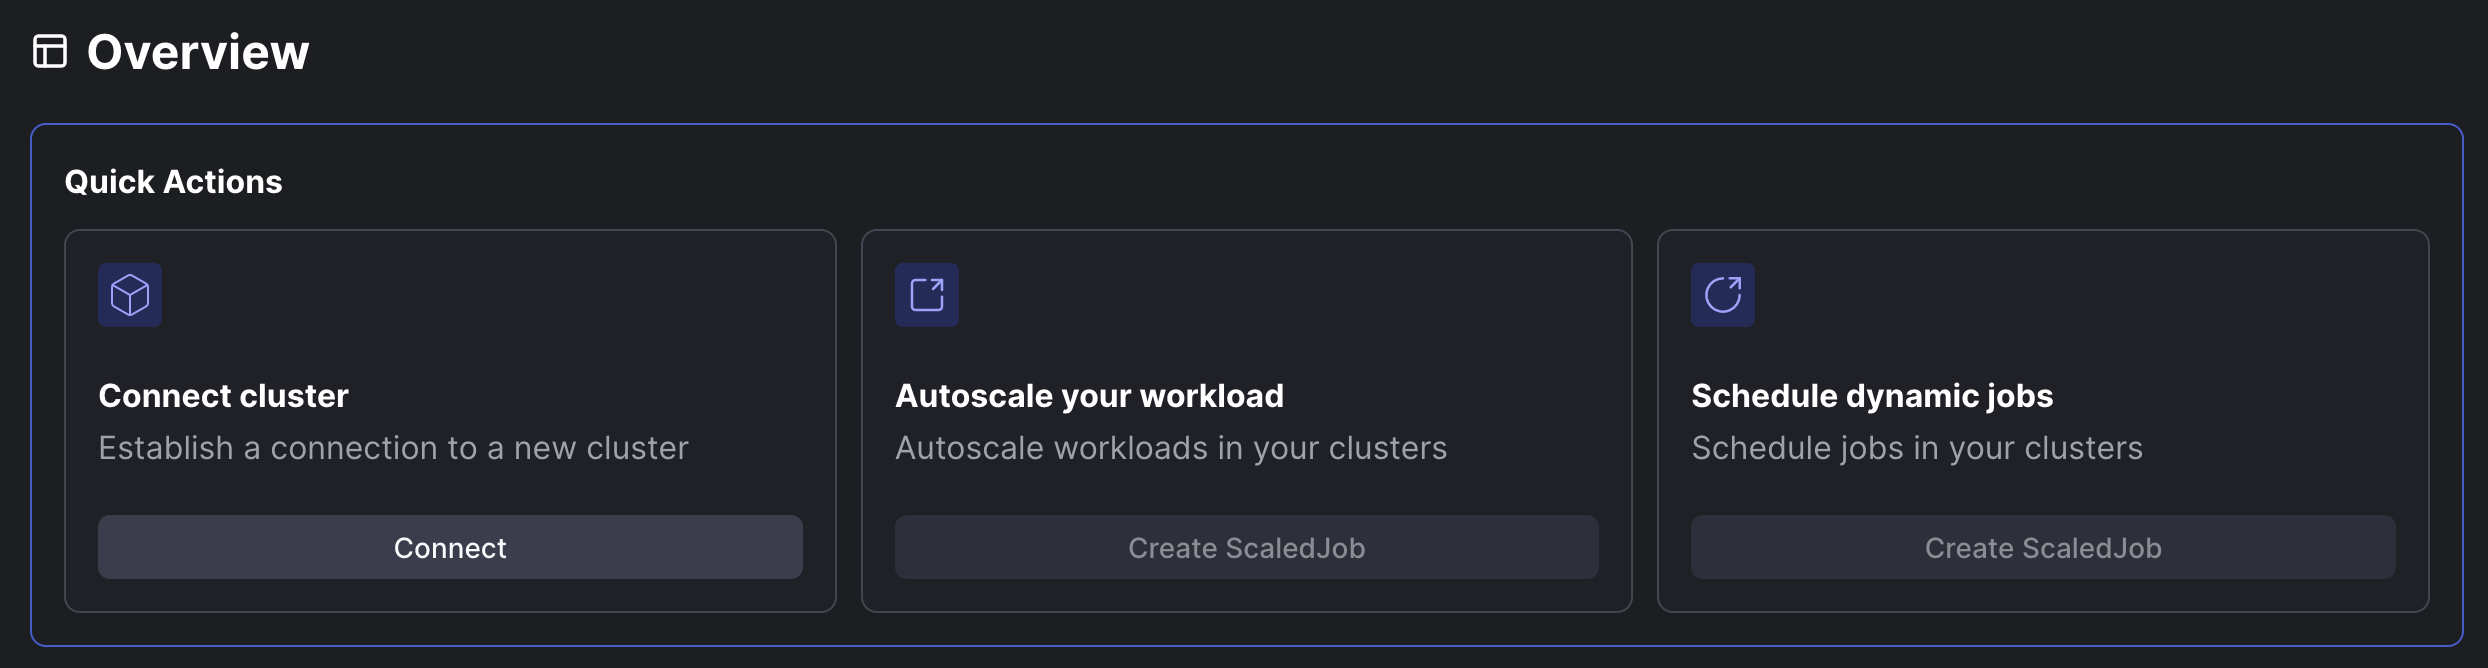
- Click on the “Connect” button under “Connect cluster”.
- Or from the Clusters section:

- Click on the “Connect cluster” button.
- Either from the Overview section:
-
Configure Connection Settings:
- Connection Name: Provide a name for your cluster connection.
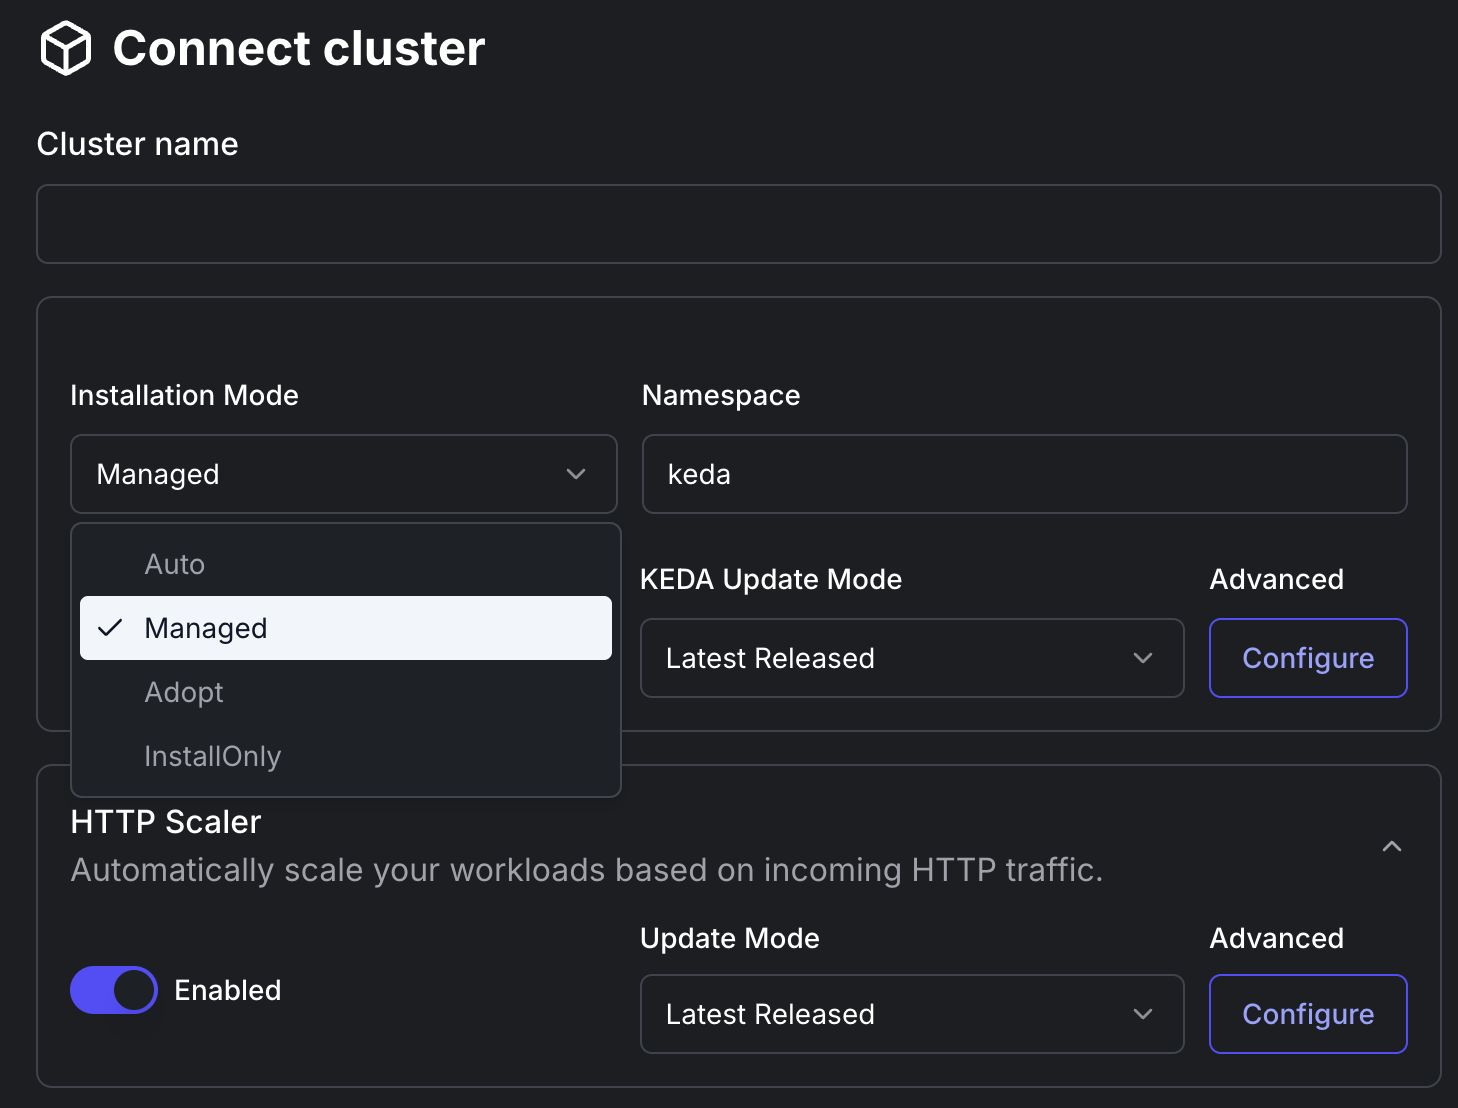
- Installation Mode: Select an installation mode:
- Auto: Auto-discovers existing KEDA or installs and manages new KEDA.
- Managed: Full installation and management of KEDA and Kedify.
- Adopt: Keeps the existing KEDA, installs and manages Kedify and the HTTP add-on. Be aware that some Kedify features (such as Kedify Scalers) might not work properly.
- InstallOnly: Installs KEDA and Kedify, user-managed.
- Connection Name: Provide a name for your cluster connection.
-
Set Namespace and KEDA Version:
- Namespace: Specify the namespace to install KEDA (default is
keda). - KEDA Version: Select the KEDA version to install.

- Namespace: Specify the namespace to install KEDA (default is
-
Configure KEDA Update Mode:
- Update Mode: Select an update mode:
- Latest Released: Always update to the latest released version.
- Patches Only: Install only patches (i.e. bug fixes).
- Do not update: Do not update anything, and keep the installed KEDA version.
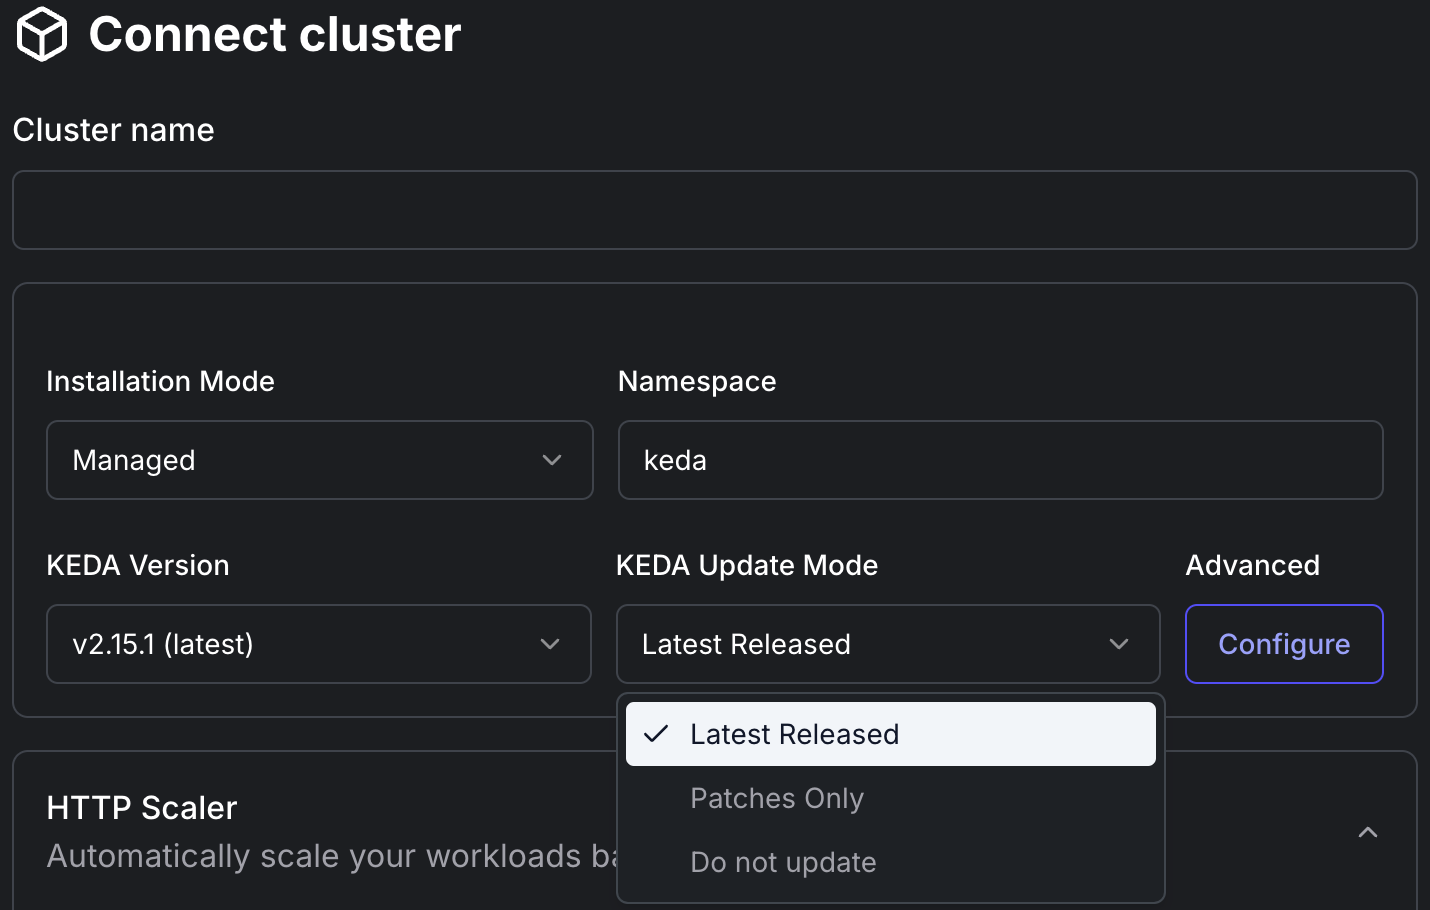
- Update Mode: Select an update mode:
-
Advanced Configuration for KEDA:
- By clicking on
Configurebutton, you can fine-tune the installation with advanced Helm Chart values. This configuration is compatible with the upstream Helm Chart values.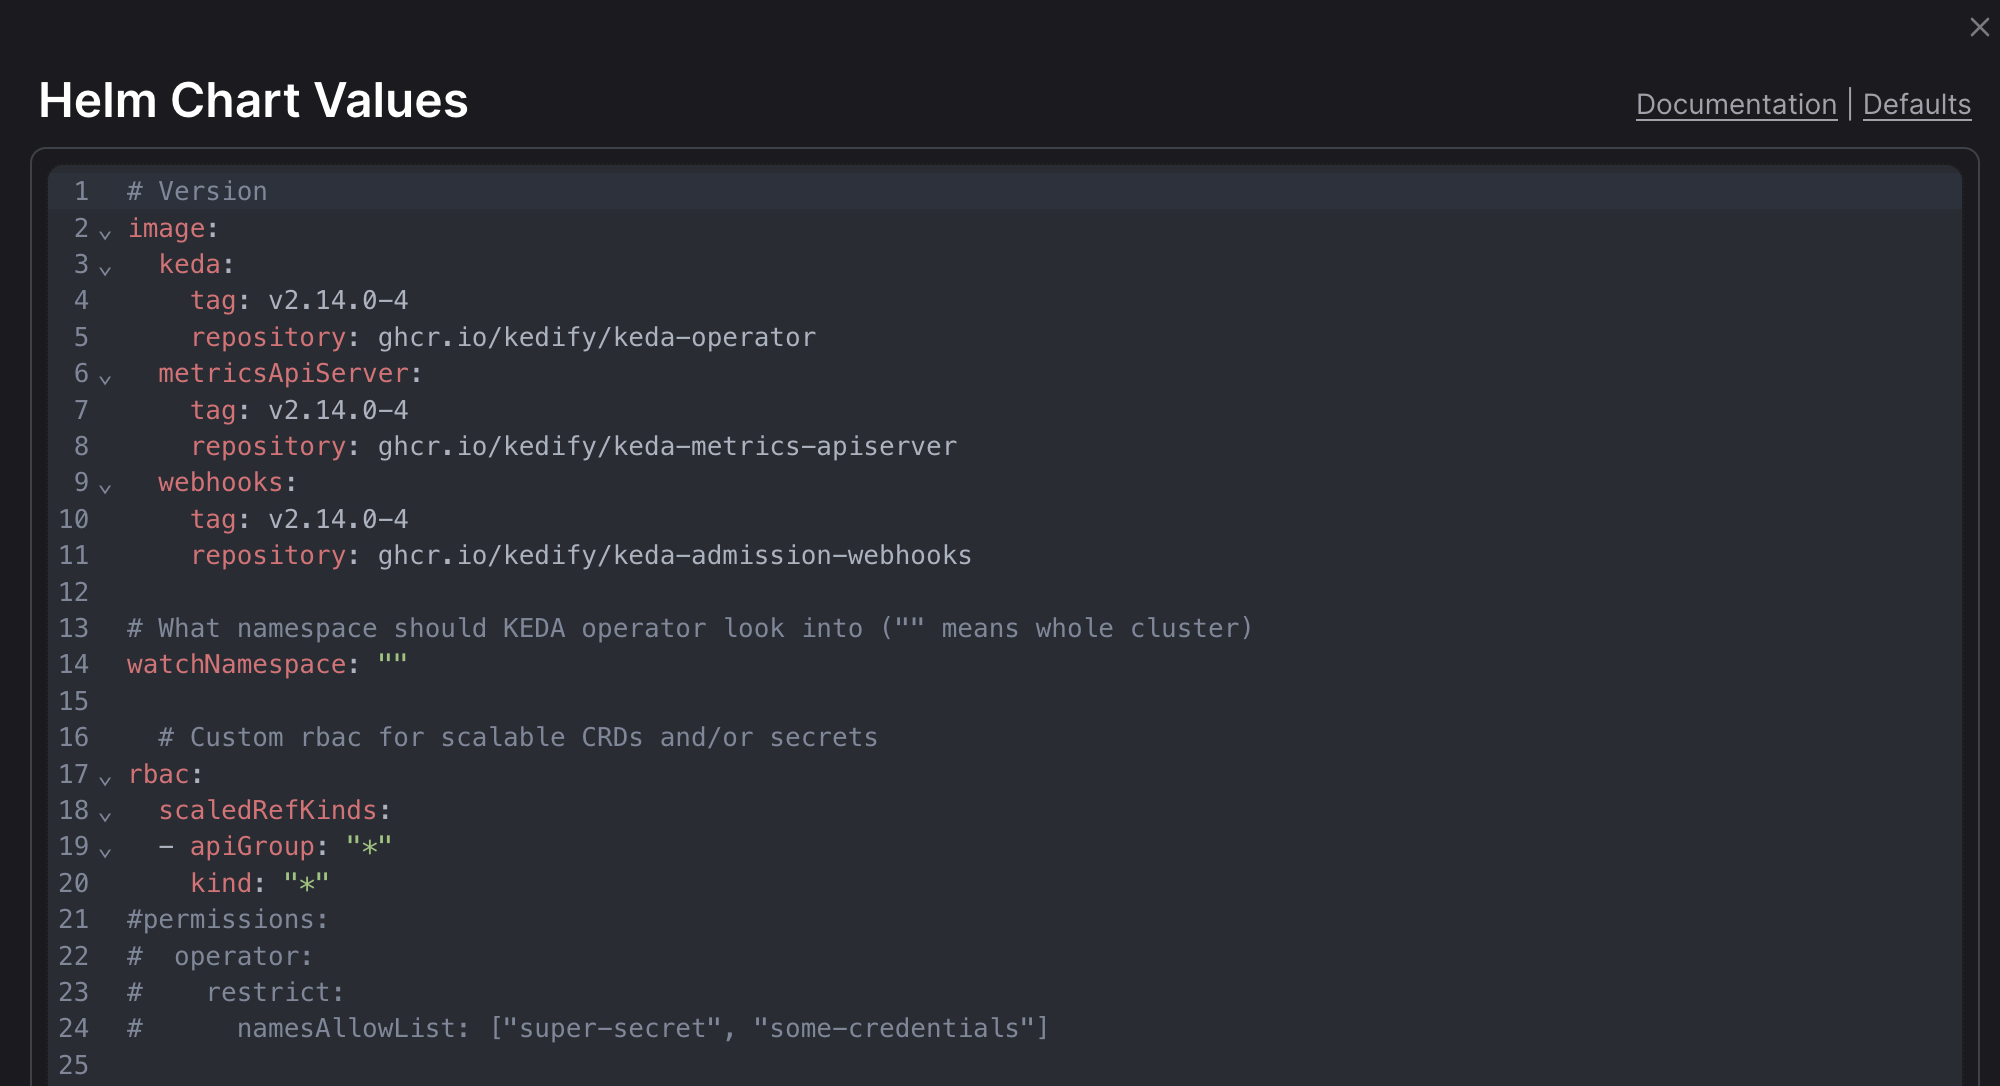
- By clicking on
-
HTTP Scaler Configuration:
- Toggle to enable or disable the HTTP Scaler based on your needs.
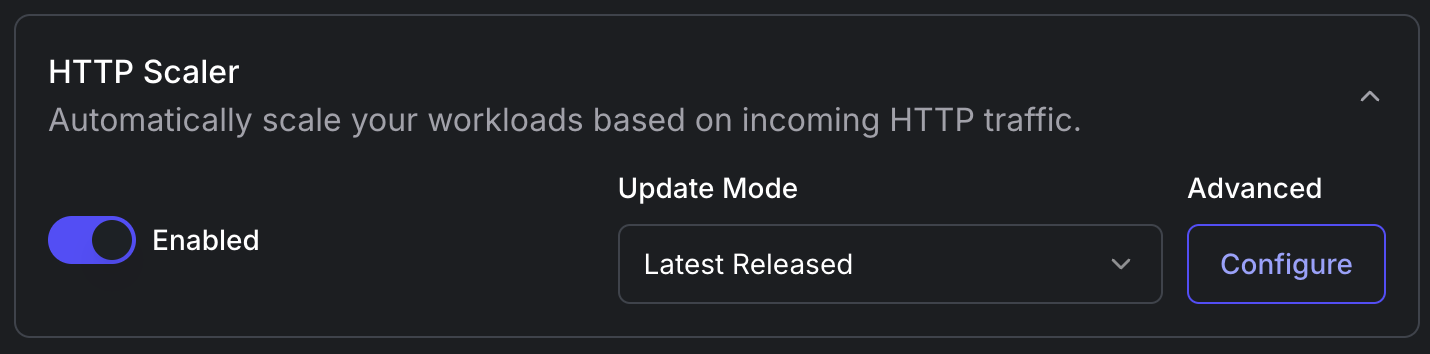
- Update Mode: Select an update mode:
- Latest Released: Always update to the latest released version of HTTP Scaler.
- Patches Only: Install only patches of HTTP Scaler (i.e. bug fixes).
- Do not update: Do not update anything, and keep the installed HTTP Scaler version.
- Toggle to enable or disable the HTTP Scaler based on your needs.
-
Advanced Configuration for HTTP Scaler:
- By clicking on
Configurebutton, you can fine-tune the HTTP Scaler with advanced Helm Chart values, compatible with the upstream Helm Chart values.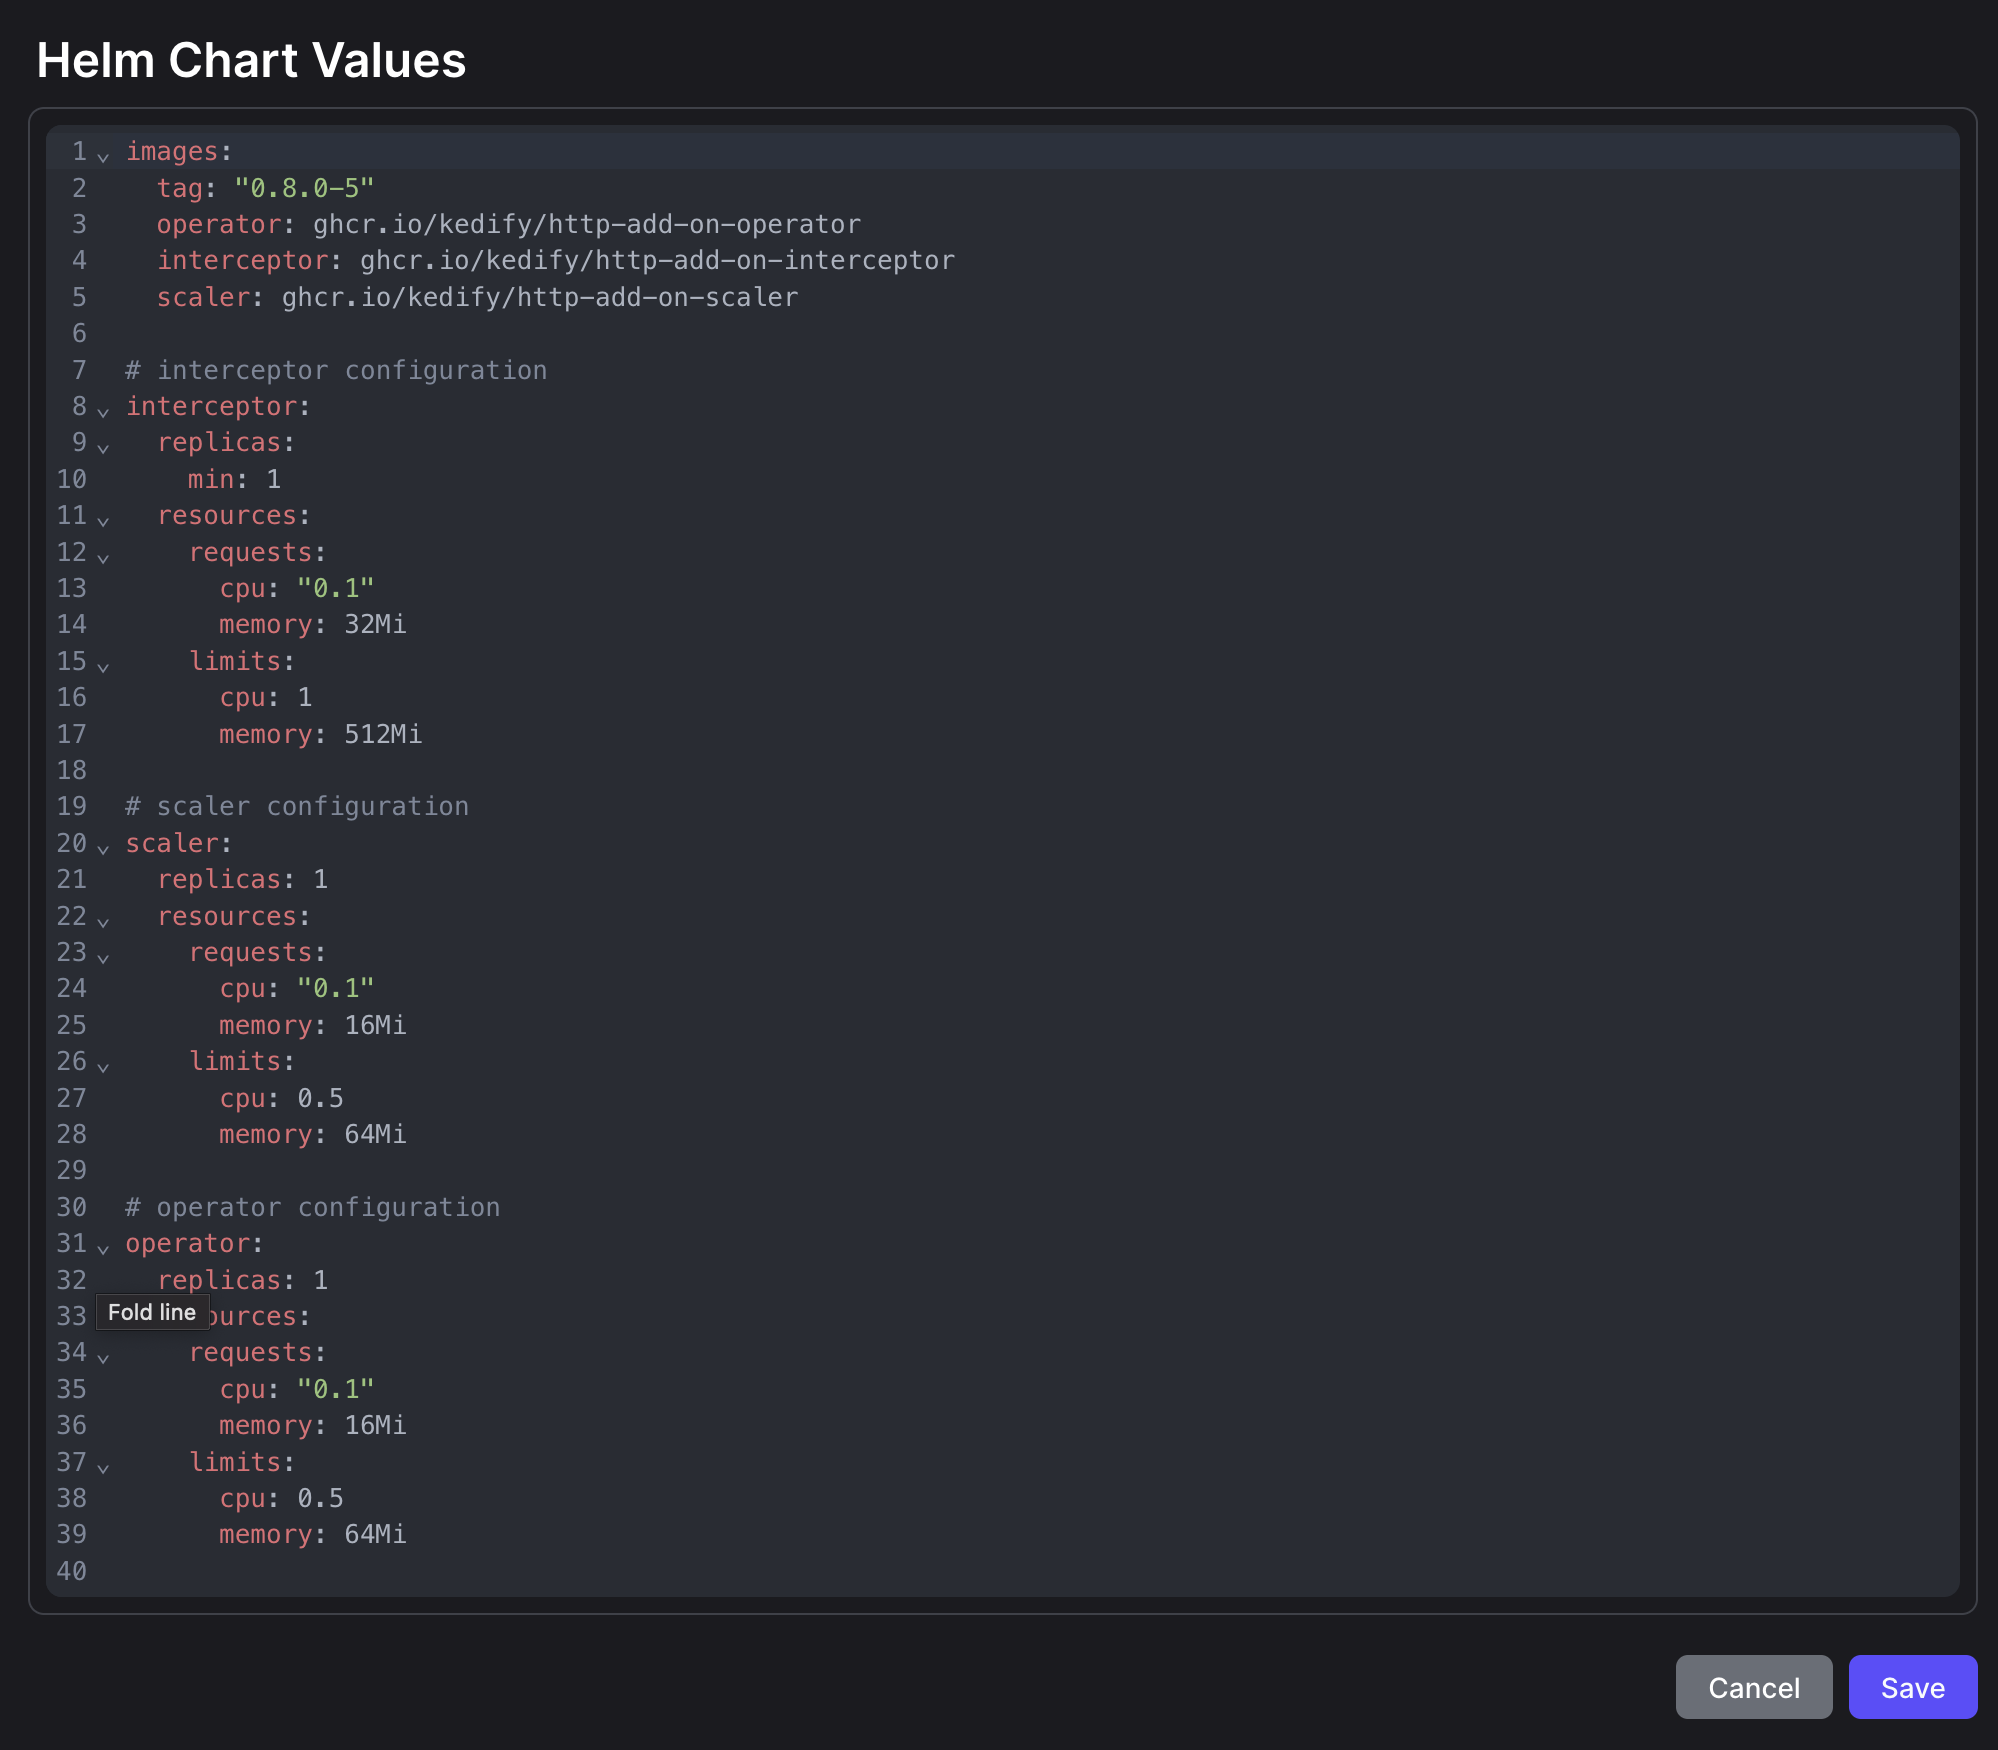
- By clicking on
-
Kedify Control Plane:
- Configure whether you want to enable Auto Update for the Control Plane. We recommend keeping this setting enabled:

- Configure whether you want to enable Auto Update for the Control Plane. We recommend keeping this setting enabled:
-
Configure Scaling Options:
- Specify which types of resources KEDA should watch and scale. By default, KEDA can scale Deployments and StatefulSets.
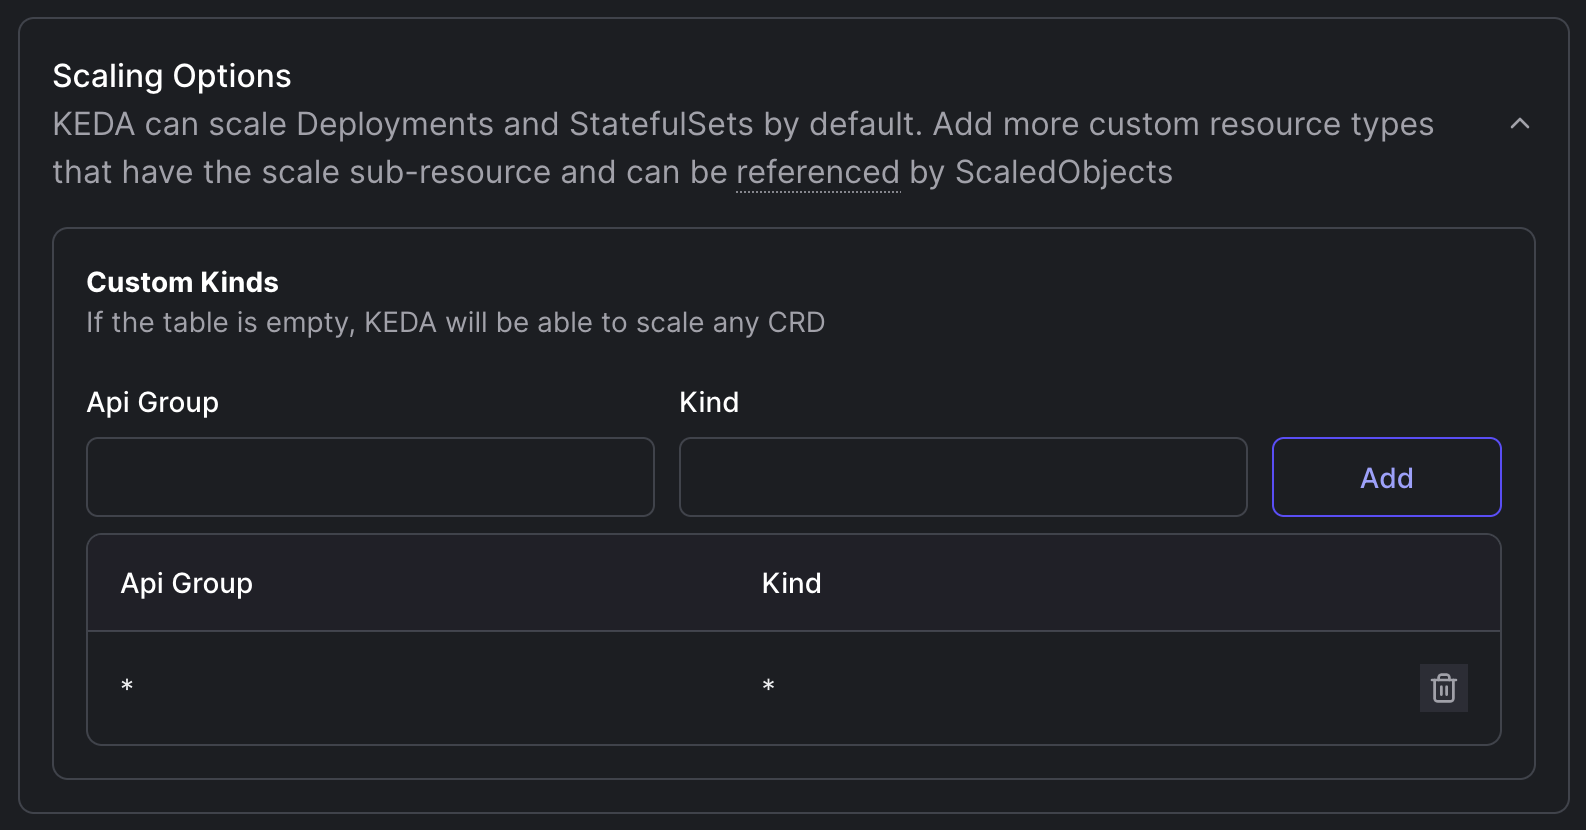
- Specify which types of resources KEDA should watch and scale. By default, KEDA can scale Deployments and StatefulSets.
-
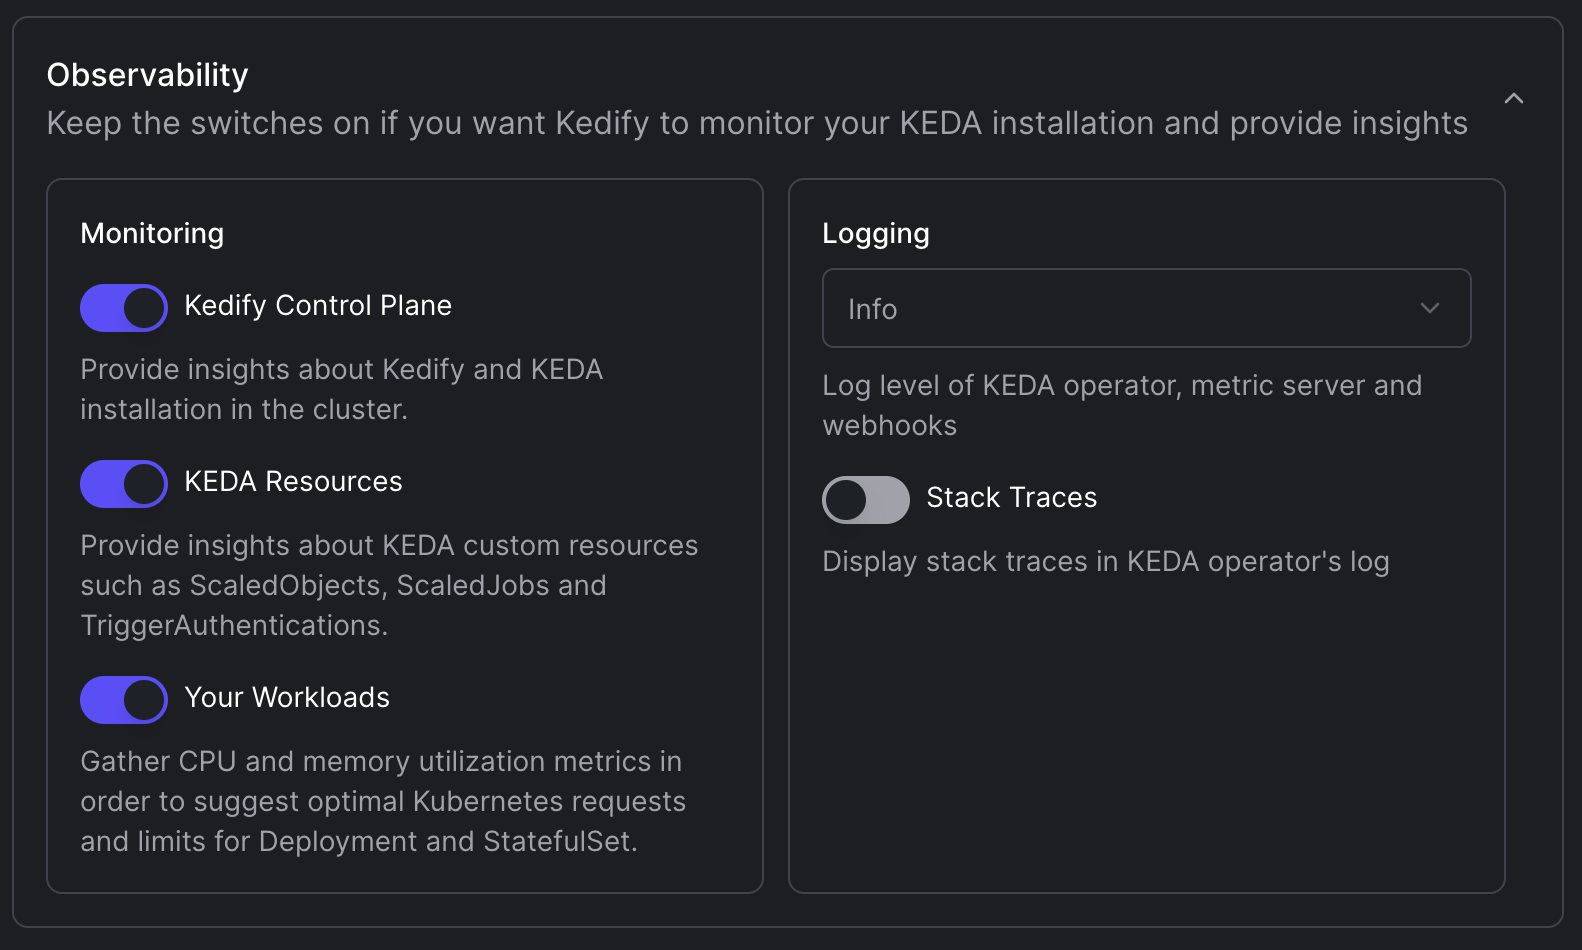
Set Observability Preferences:
- Enable monitoring for the Kedify Control Plane, KEDA Resources, and your workloads.
- Set the log level for KEDA operator, metric server, and webhooks. Optionally enable stack traces in the logs.
- Save and Install:
- Once all configurations are set, click on “Save”.
- Use the provided
kubectlcommand to connect the cluster.
This command sets up the Kedify Agent with all necessary configurations to connect to the Kedify platform and manage your KEDA and HTTP Scaler installations efficiently.
Update Cluster Connection
To update a cluster connection, follow these steps:
-
Edit Cluster Connection:
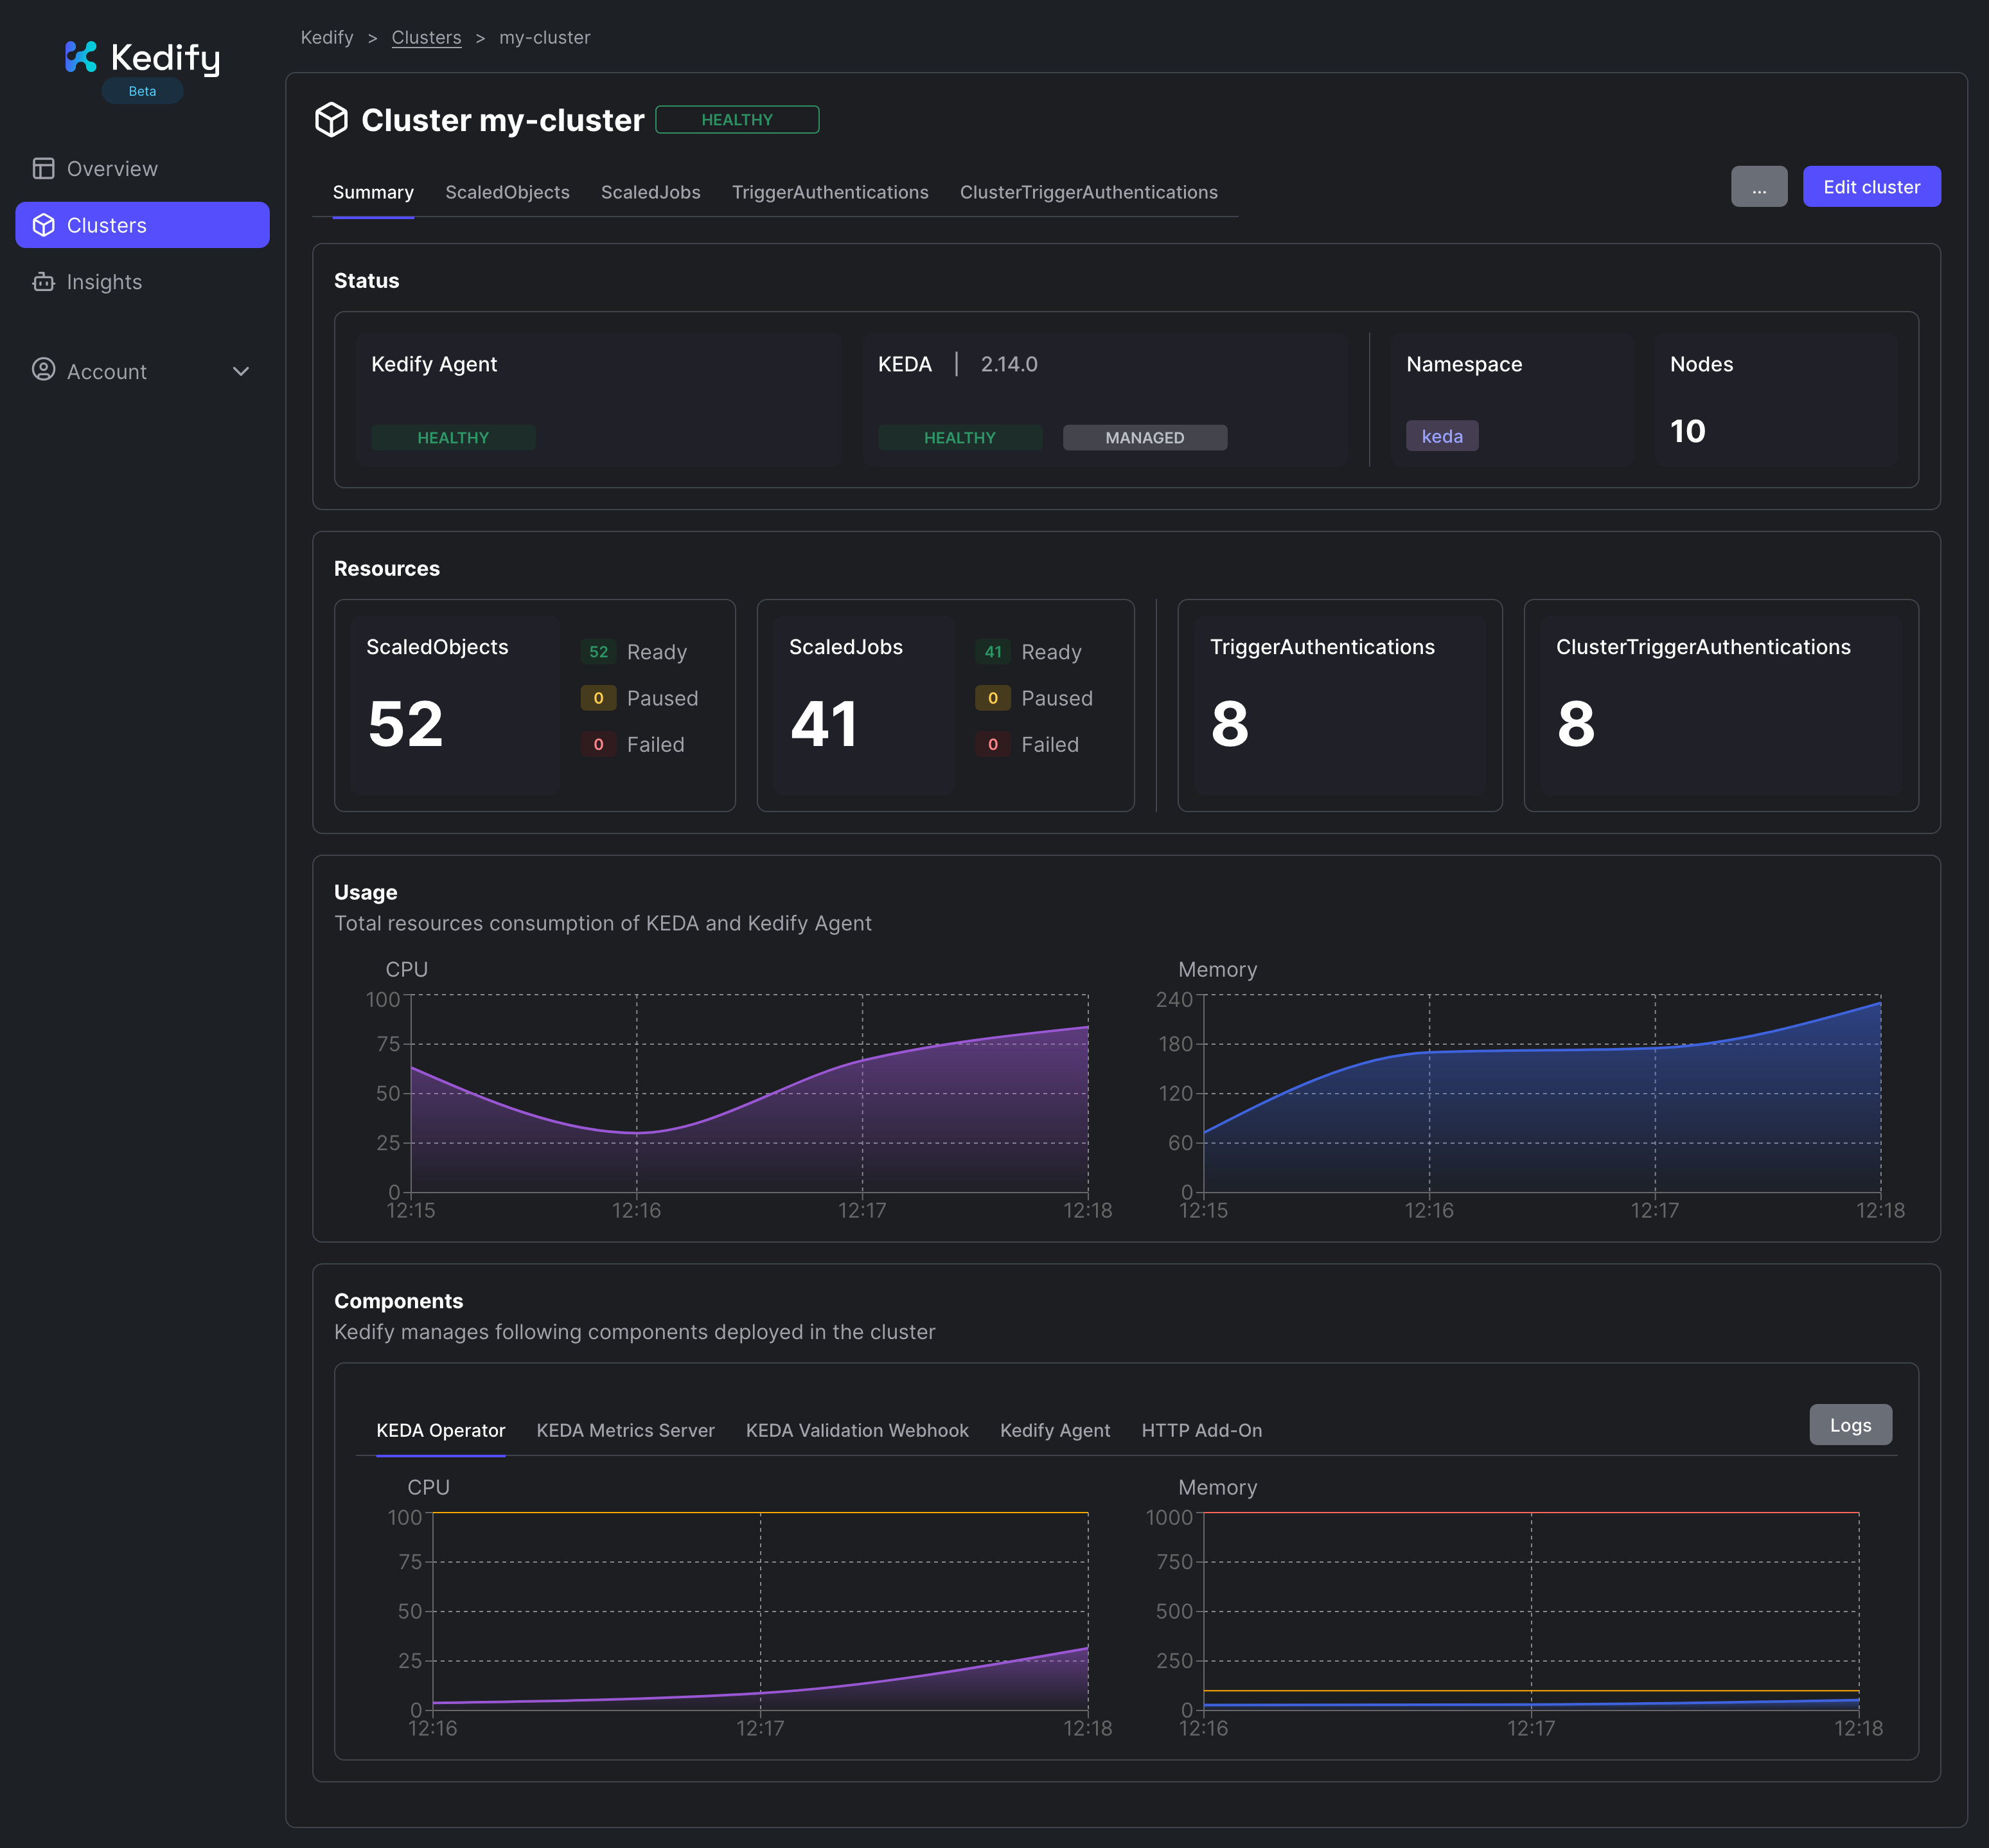
- Click on the
Editbutton in the Cluster overview. - This will allow you to update the connection settings for your cluster.
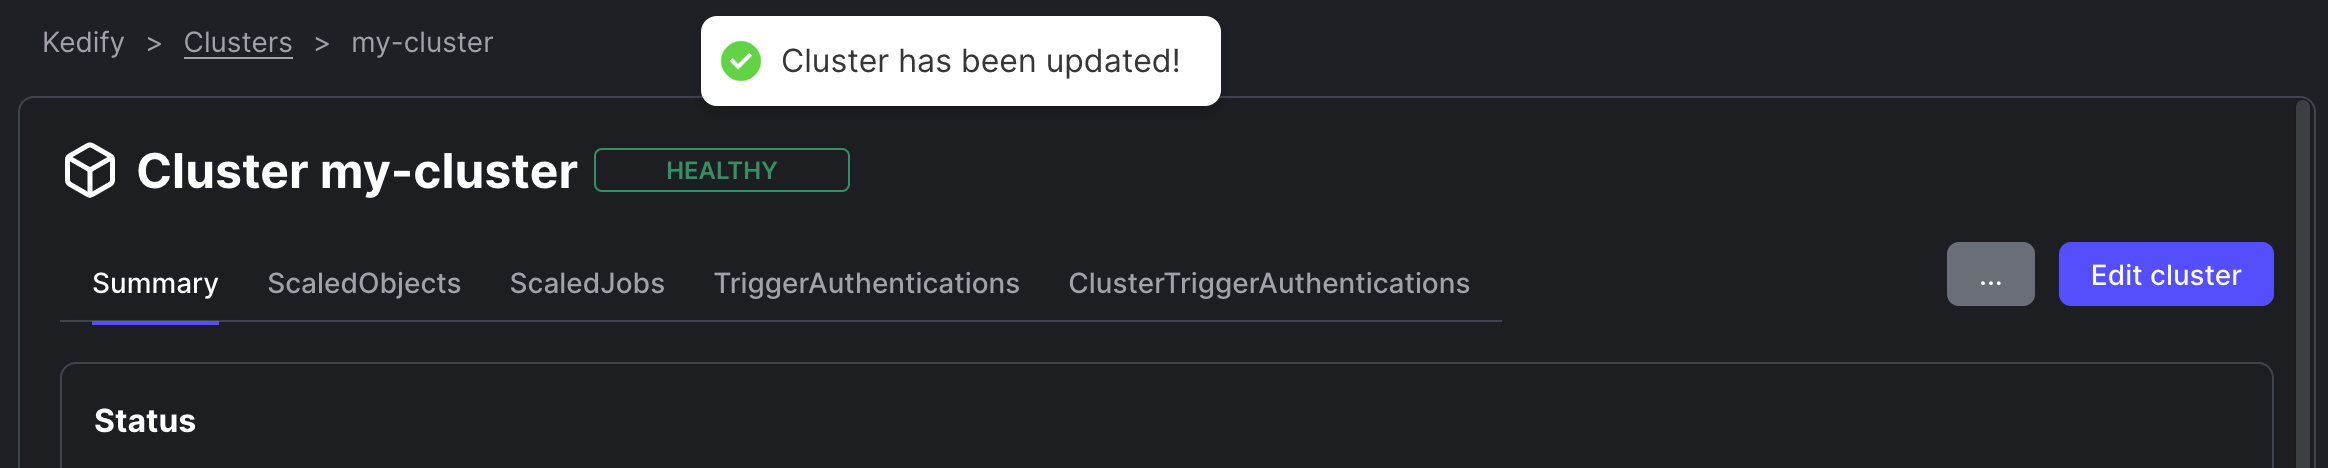
- After the successful Cluster Connection update, you should see following infor message:
- Click on the
-
Additional Options:
- Click on the
...button to access additional options:- Get Installation Command: Retrieve the
kubectl applycommand used for the installation. - Get Uninstallation Command: Retrieve the command to uninstall Kedify from your cluster.
- Get Installation Command: Retrieve the
- Click on the
Advanced Configuration
In this section, we will cover advanced configurations and common troubleshooting steps to ensure that your KEDA setup runs smoothly. These configurations will help you tailor KEDA to fit into specific environments and resolve potential issues.
Custom DNS Domain
If your Kubernetes cluster uses a custom DNS domain instead of the standard cluster.local suffix, you need to configure KEDA to work properly. For example, if you are using the domain my-cluster.com, follow these steps:
Kedify Agent
Update Kedify Agent deployment, we assume that keda is the installation namespace:
kubectl set env deployment/kedify-agent CLUSTER_LOCAL_DOMAIN=my-cluster.com -n kedaKEDA
-
In the KEDA Operator, set the container argument
k8s-cluster-domaintomy-cluster.com. -
In the KEDA Metrics Server, set the container argument
metrics-service-addresstokeda-operator.%s.svc.my-cluster.com:9666.
This needs to be done in Helm in the KEDA advanced config by Updating Cluster Connection by adding following values and saving the cluster config and connection.
Please add the whole extraArgs section to the config if it is missing, or update if it already exists:
extraArgs: keda: k8s-cluster-domain: my-cluster.com metricsAdapter: metrics-service-address: keda-operator.%s.svc.my-cluster.com:9666HTTP Scaler
If HTTP Scaler is enabled for the cluster, we need to instruct HTTP Scaler interceptor component as well. This needs to be done in Helm in the HTTP Scaler advanced config by Updating Cluster Connection by adding following values and saving the cluster config and connection.
Please add clusterDomain: my-cluster.com to the existing interceptor section:
interceptor: clusterDomain: my-cluster.com replicas:Istio
When setting up KEDA, you might encounter an error like (v1beta1.external.metrics.k8s.io) status FailedDiscoveryCheck if you have Istio installed as a service mesh in your cluster. This issue can also cause namespace deletion failures with an error such as:
NamespaceDeletionDiscoveryFailure - Discovery failed for some groups, 1 failing: unable to retrieve the complete list of server APIs: external.metrics.k8s.io/v1beta1: the server is currently unable to handle the request
To resolve this issue, follow these steps:
-
Prevent the sidecar injection of Istio by labeling the KEDA installation namespace accordingly (we assume it is
keda):kubectl label namespace keda istio-injection=disabled -
Verify that the label is set:
kubectl describe ns keda -
Redeploy KEDA into the namespace
kedaand re-check the status of the API service. It should now have the statusTrue. You can do that by deleting all pods in thekedanamespace:kubectl delete pods --all -n keda
Explanation
If you need more details, here’s an in-depth explanation:
-
Check the Setup
We assume that KEDA is installed in the namespace
keda. -
Check the KEDA API Service Status
Example:
kubectl get apiservice v1beta1.external.metrics.k8s.io -o yamlIf the status is
False, there might be an issue with the KEDA installation. -
Check Istio Installation
kubectl get svc -n istio-systemIf Istio is installed, you will get a result like:
NAME TYPE CLUSTER-IP EXTERNAL-IP PORT(S) AGEistio-ingressgateway LoadBalancer 100.65.18.245 34.159.50.243 15021:31585/TCP,80:31669/TCP,443:30464/TCP 3distiod ClusterIP 100.65.146.141 <none> 15010/TCP,15012/TCP,443/TCP,15014/TCP 3d -
Check KEDA Namespace Labels
kubectl describe ns kedaIf Istio injection is enabled, there will be no label stating
istio-injection=disabled. Sidecar injection of Istio can prevent the API service of KEDA from working properly. -
Prevent Sidecar Injection of Istio
Label the KEDA installation namespace accordingly (we assume it is
keda):kubectl label namespace keda istio-injection=disabled